There are two basic systems:
Tank->regulator->check valve->bubble counter->sintered glass diffusor
This is the simplest and cheapest. A needle valve can and should be used in place of the check valve unless money is a prime consideration. A good needle valve can now be had for as little as $25.
For detailed Q & A, see the FAQ.
Tank->high regulator->adaptor->low regulator->adaptor

        ->check valve->bubble counter->reactor
These systems are more expensive. I think it is hard to make them stable without spending a lot of money. We do not recommend or sell them.
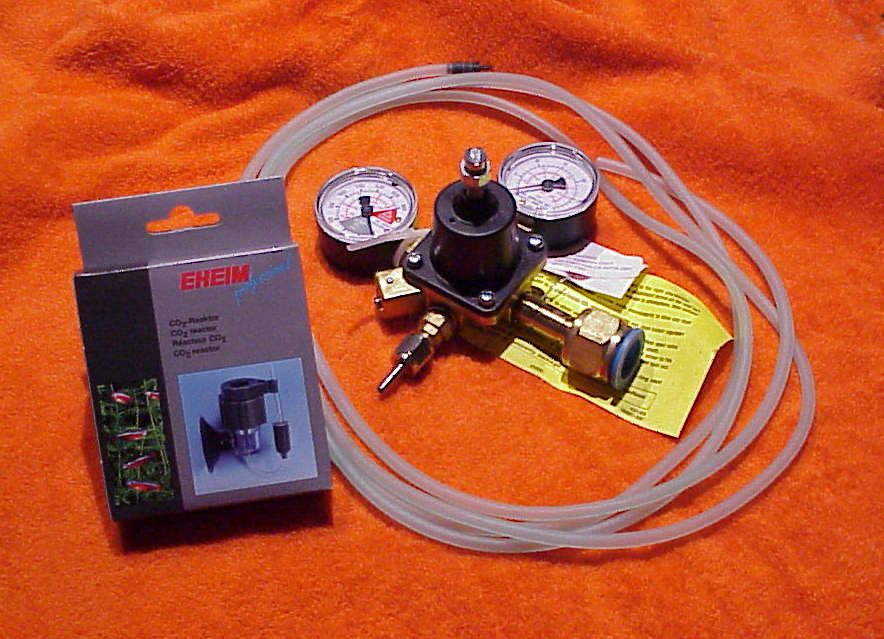
| Norgren regulator | no longer offered | ||
| Eheim diffusor | 30 | (2.40) | (includes check valve and bubble counter, hose, adapter) |
| Fabco needle valve | 27 | (2.20) | (includes adaptors, a good idea if you have fish) |
| Fabco nv & Eheim diffusor | 50 | (4.00) | |
Needle valve comparison.... | |||
| Clippard MNV-4K2 from mfgr | 26.03 | ||
| Similar from monstrous co. | 28.50 | ||
| Our needle valve | 27.00 | ||
| Prices are quantity one, postpaid, excluding sales tax. | |||
Charateristics | us | them | |
| Fabrication technique | machined | cast | |
| Shutoff | ok | ng | |
| Minimum sonic flow (bubbles/min) | 3 | 30 | |

This product has a couple of minor problems that hopefully the manufacturer will fix right away. Nothing major. But it has convinced us that a price sensitive user would find it hard to justify the extra quality of our regulator, and that has been corroborated by falling regulator sales. We therefore have reluctantly discontinued selling regulators.
You can still find Norgren regulators at welding and refrigeration companies. Be sure to get a 30psi output pressure gauge and a barb fitting for 5/32" hose.
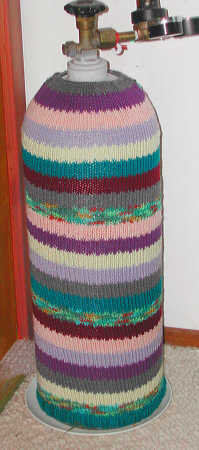 My daughter, Seri, makes these wonderful covers.
 Even tie-dyed ones....
Questions? email gomberg1 at sfwcf dot com
This is really easy. You get a regulator (big lumpy thing with two gauges), a piece of blue carbon dioxide-resistant hose with a black adapter in one end, and a grey box. You will get a needle valve and two adaptors if you ordered one. In fifteen minutes you will see a beautiful flow of carbon dioxide in your tank.
Assemble the grey box contents, following the pictures on the box. Be very careful of the white disk and the clear plastic body part. They are both very fragile and should be handled with care. The nipple for the clear plastic hose can break off the clear plastic part. If you ever need to remove the clear plastic hose from the clear plastic nipple, gentle urge the hose backwards off the nipple. If you pull sideways you will snap the nipple for sure.
To assemble the Eheim diffusor, place the black ring on the white disk at the edges, place the disk into the top of the clear plastic body, add the clip and screw the top ring to secure the clip.
If you are NOT using a needle valve, cut the clear hose into one short piece (2-3") and the rest. Place one end of the short piece onto the clear plastic body nipple and the other end onto the check valve at the end opposite the molded-in arrow. Place one end of the long tube into the other end of the check valve (the other end of the long tube attaches to the black plastic adaptor).
If you ARE using a needle valve, attach the clear hose to the bottom of the clear plastic body nipple. Do not cut the clear hose. Keep the check valve (grey plastic with an arrow molded into the side) as a keepsake. Do not use it.
You should fill the clear plastic body of the diffusor with water so that you can see the CO2 bubbles as the rise thru the diffusor body. When you mount the suction cup in your tank, put it as near the bottom as you can and in the back where it is a bit less visible. (three minutes)
Attach the end of the green hose with the black plastic adapter to the Eheim clear hose. (one minute)
The regulator comes with a black plastic hose barb on it. There should be a sealant on the black plastic fitting where it meets the regulator, either YELLOW Teflon tape (for gases) or a pipe dope type sealant for gases (sticky). This is a location where leaks can occur. Attach the other end of the green hose to the black hose barb on the regulator. (one minute)
If you have a needle valve, cut the green hose a few inches from the regulator. Attach the two plastic threaded adaptors into the body of the valve. Tighten them just a bit tighter than you can with your fingers alone. Plug one each of the cut ends of the green hose into each of the plastic needle valve adaptors. (three minutes)
Attach the regulator to the carbon dioxide tank (DON'T OPEN THE VALVE YET!) (takes a wrench, four minutes to find the wrench, one minute to install the regulator)
Follow the instructions on the yellow slip with the regulator. Don't lose the yellow slip! (two minutes)
If you are NOT using a needle valve, set the regulator for just a second to 20-25 psi to open the check valve (they are often stuck after being closed for so long in shipment). Turn the regulator on in the morning of a day you will be able to watch carefully. Set the pressure to 12.5psi (or so). This should produce a bubble every few seconds. At hourly intervals, measure the bubbling rate. The bubbling rate should slowly climb. When it has stabilized, then move the pressure 1 psi up or down towards your target value of bubbling (higher psi = more bubbles per second). Make these motions once a day. When you have acheived your desired bubbling rate you are done for now. Record the pressure.
If you ARE using a needle valve, set the regulator low pressure gauge to 20 psi and leave it there. Set the needle valve up or down towards your target value of bubbling (clockwise for less CO2, counterclockwise for more). If you are at a loss for what a good rate would be, try one bubble per second per 50 gallons of water in your aquarium. MAKE SMALL CHANGES. Make these changes once a day. When you have acheived your desired CO2 level you are done for now. Watch your system carefully until it has been stable for some time. Watch it carefully if you need to change anything (like the pressure or the needle valve setting or the flow rate or install a fresh cylinder or anything of the sort).
If you are at all in doubt about the stability of the system, shut the master valve off overnight after recording the psi and bubbling rate. This will ensure that no catastrophic event occurs.
Q: Wait, I am having trouble getting my system started.
A: There are a couple of tricks to setting up and tuning a new system.
Problems:
1. When you first blow the check valve open, more pressure is required.
2. When you first put the hose on, it has not relaxed to "fit" the barb as well.
To get around the first one, you can just hold the hose on the barb long enough to pop the check valve open. Then proceed as normal. Remember the check valve has been closed for a long time, so its back pressure characteristics change during the first few days. Keep a close eye on things. Don't go on vacation and hope that nothing will change.
The solution to the second problem comes in two parts. The first part is just to shove the hose on well and leave it for a few hours to relax. If it still blows off, use a small amount of silicone adhesive on the barb to secure the hose slightly. Smear adhesive on the barb, breathe very heavily on it (moisture helps the adhesive set), then shove the hose on. Let it sit for 24 hours to set.
It is OK to add a new LFS (local fish store) check valve after the needle valve. Get a brass one if you can, they are a bit sturdier (I hope). This is to reduce the risk of damage from water flowing back into the needle valve and regulator.
Close the needle valve and open the regulator to 20 psi. Carefully open the needle valve to the desired flow volume. Make sure that this flow volume results in the CO2 level you desire.
Here is the poor man's way, it is more work. Just set each diffusor up as in the needle valve instructions above. Use a needle valve right after the regulator, then one T connector for each EXTRA Eheim. Be sure to omit the check valve from each Eheim assembly. Use a high-quality airline valve or a C-clamp for hoses to adjust the flow to each Eheim individually to get just the desired flow. If you change one setting you will have to re-adjust the whole system.
Set the regulator initially to 20 psi, open the needle valve to provide the flow desired in the slowest flowing Eheim. Then use the separate valves for each Eheim to correct the flow to that diffusor. As you cut back each separate valve, the flow to other diffusors will increase; cut back on the needle valve when this becomes excessive. Several iterations of this process may be needed to accurately balance your system.
Last updated: Just last week!